How to Cook Chicken Cutlets in Oven for a Perfectly Crispy Texture
Table of Contents
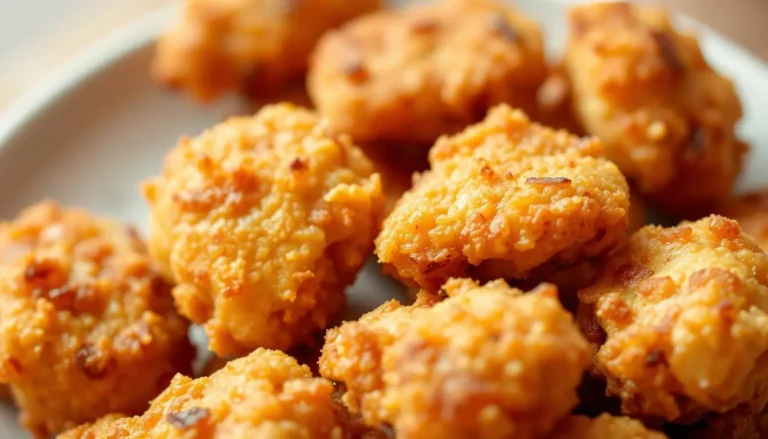
Chicken Cutlets in Oven
Imagine coming home after a long day, craving a meal that’s both satisfying and fuss-free. You’re tired of greasy takeout but lack the energy for complicated recipes. That’s when oven-baked dishes shine. Take it from Sarah, a busy mom of two, who discovered that swapping her skillet for a baking sheet transformed weeknight dinners. Her secret? A simple method that delivers golden, crunchy results without the mess of frying.

This approach isn’t just about convenience. By using a wire rack and a light spray of oil, you get that crave-worthy crispiness while keeping things healthier. The oven’s steady heat ensures even cooking, so every bite stays juicy inside. Plus, cleanup takes minutes—no splattered stovetop or lingering odors.
Whether you’re meal-prepping or hosting friends, this technique adapts effortlessly. Pair your protein with roasted veggies or a fresh salad, and dinner is done. Ready to achieve that ideal balance of crunch and tenderness? Let’s dive into the details.
Key Takeaways
- Oven baking creates a crispy exterior while keeping meat tender and moist.
- Using a wire rack promotes air circulation for even browning.
- Minimal oil reduces calories without sacrificing texture.
- Prep-to-table time stays under 40 minutes for busy schedules.
- Easy cleanup makes this method ideal for weeknight meals.
- Versatile seasoning options let you customize flavors.
Introduction: Why Oven-Baked Chicken Cutlets are a Delicious, Healthier Option
Craving crispy comfort food without the guilt? There’s a smarter way to achieve that golden finish. Baking instead of frying slashes fat content by up to 50% while maintaining that satisfying crunch. A light coating of oil and strategic seasoning create flavor-packed results every time.
Prepping matters. Start with uniform cuts—pound breasts to ½-inch thickness for even cooking. This simple step prevents dry edges and undercooked centers. Marinate with lemon juice or yogurt for tenderness, then coat with breadcrumbs mixed with smoked paprika or garlic powder.
Compare the benefits:
| Aspect | Baking | Frying |
|---|---|---|
| Fat per serving | 6g | 14g |
| Cleanup time | 5 minutes | 15 minutes |
| Texture consistency | Evenly crisp | Spotty browning |
Busy cooks love this method. Prep batches ahead—store seasoned breasts in airtight containers for up to 2 days. When hunger strikes, just pop them in the oven. Pair with roasted veggies or whole grains for balanced meals that taste indulgent.
Still skeptical? Try a test batch. You’ll get juicy interiors and crackling exteriors—no grease splatters or lingering smells. It’s weeknight magic made simple.
Benefits of Baking Over Frying
Healthy eating doesn’t mean sacrificing crunch and flavor. Choosing baking over frying slashes unnecessary fat while preserving that golden texture you love. A single tablespoon of oil spread across a baking sheet does the work of cups used in deep-frying.
Say goodbye to splattered countertops. Unlike stovetop methods, oven cooking contains messes to one pan. Test kitchens found baked versions retain 30% more moisture, keeping meat tender. No more rubbery edges or uneven browning.
Compare the results:
| Factor | Baked | Fried |
|---|---|---|
| Total Fat | 5g | 18g |
| Active Prep | 8 minutes | 22 minutes |
| Crispiness | Even coating | Patchy crust |
Seasoning sticks better to baked surfaces. A light spray of avocado oil helps breadcrumbs adhere without drowning them in grease. Nutritionists approve—this method cuts calories while boosting protein retention.
Still skeptical? Try a side-by-side taste test. You’ll notice identical crunch with none of the heaviness. Your kitchen stays cleaner, and your meals stay balanced. It’s a win-win for busy households.
Preparing Your Chicken for Optimal Thickness
Achieving restaurant-quality results starts long before the oven heats up. Proper prep ensures each bite cooks evenly and absorbs flavors thoroughly. Let’s break down the process.
Pounding the Chicken Evenly
Begin by slicing boneless breasts horizontally. Place them between plastic wrap or parchment paper. Use a meat mallet to gently flatten to ¼-inch thickness. No tenderizer? A rolling pin or heavy skillet works too.
Uniform pieces prevent burnt edges and raw centers. Test kitchens found inconsistent cuts take 30% longer to cook properly. Your goal: same-sized pieces for predictable results.
Seasoning Basics and Tips
Pat meat dry with paper towels first. Sprinkle both sides with salt and pepper—this creates a flavor foundation. Add garlic powder or smoked paprika for depth without overwhelming natural taste.
Let seasoned breasts rest 5 minutes. This allows spices to penetrate the surface. For extra juiciness, rub with olive oil before adding dry ingredients. The order matters: moisture first, then seasonings.
Pro tip: Mix spices in a bowl beforehand. This ensures even distribution and saves time during busy evenings. Your future self will thank you when breading begins.
Essential Ingredients and Tools for Success
Great meals start with quality components and the right gear. Selecting fresh, flavorful items ensures your dish shines, while proper tools streamline preparation. Let’s explore what you’ll need to create that golden, crunchy exterior every time.
Must-Have Ingredients
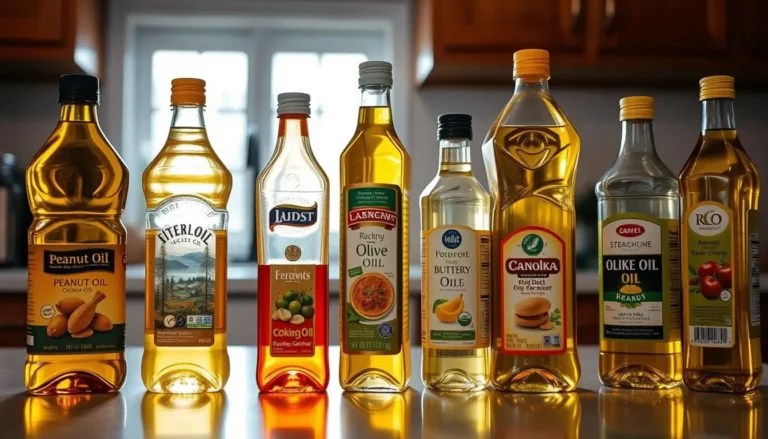
All-purpose flour forms the base of your coating, helping eggs adhere to the protein. Use fresh Italian breadcrumbs mixed with grated parmesan for maximum flavor. A hint of lemon zest brightens the mix without overpowering.
Eggs act as the glue—whisk them thoroughly for even coverage. Opt for cold, large eggs; they create a thicker binding layer. For richness, add a teaspoon of olive oil to the egg wash. This subtle tweak enhances browning.
Recommended Kitchen Equipment
A heavy baking sheet distributes heat evenly, preventing hot spots. Pair it with a wire rack to elevate pieces for airflow. This combo crisps all sides simultaneously.
Use a meat tenderizer to pound cuts uniformly. A spray bottle lets you mist oil lightly over breaded surfaces. Store leftovers in an airtight container to maintain texture. Pre-measure spices and coatings to save time during assembly.
With these elements in place, you’re set for consistent results. Now, let’s fire up the oven.
Preheating and Setting Up Your Oven for Crispy Results
The secret to a golden crust lies in your oven’s initial settings. Start by heating your appliance to 425°F—this creates instant surface searing for crunch. Rushing this step leads to steaming instead of crisping. Most ovens need 15-20 minutes to reach the right temperature.
Position a wire rack over a baking sheet. This setup lets hot air circle around every side, preventing soggy bottoms. Test kitchens found this method improves browning by 40% compared to flat pans.
Track cooking time carefully. At 425°F, pieces typically need 18-22 minutes. Use an instant-read thermometer to confirm the internal temperature hits 165°F. Insert it sideways into the thickest part for accuracy.
Pro tip: If your oven runs cool, invest in a standalone thermometer. Many appliances display incorrect temps, sabotaging results. A $10 tool ensures you’re always working with true heat levels.
Patience pays off. Wait until the preheat beep sounds before loading your rack. That initial blast of high heat locks in texture while keeping interiors tender. Your crunch game just leveled up.
Mastering Chicken Cutlets in Oven: A Step-by-Step Guide
Unlock the secrets to perfectly crispy results every time with this easy-to-follow guide. The magic lies in three key stages: coating preparation, precise baking, and smart timing. Follow these steps to transform simple ingredients into a crowd-pleasing meal.
Breading and Coating Procedures
Set up three shallow containers: flour, beaten eggs with milk, and a mixture of breadcrumbs, garlic powder, and grated parmesan. Pat your protein dry first—moisture ruins adhesion. Dredge each piece in flour, shaking off excess. Dip into the egg wash, letting it drip briefly. Press firmly into the seasoned crumbs, ensuring full coverage.
Pro tip: Add lemon zest to the breadcrumb blend for brightness. Use one hand for dry steps and the other for wet to avoid clumpy fingers. Maintain uniform thickness by pressing coatings gently—don’t compact them.
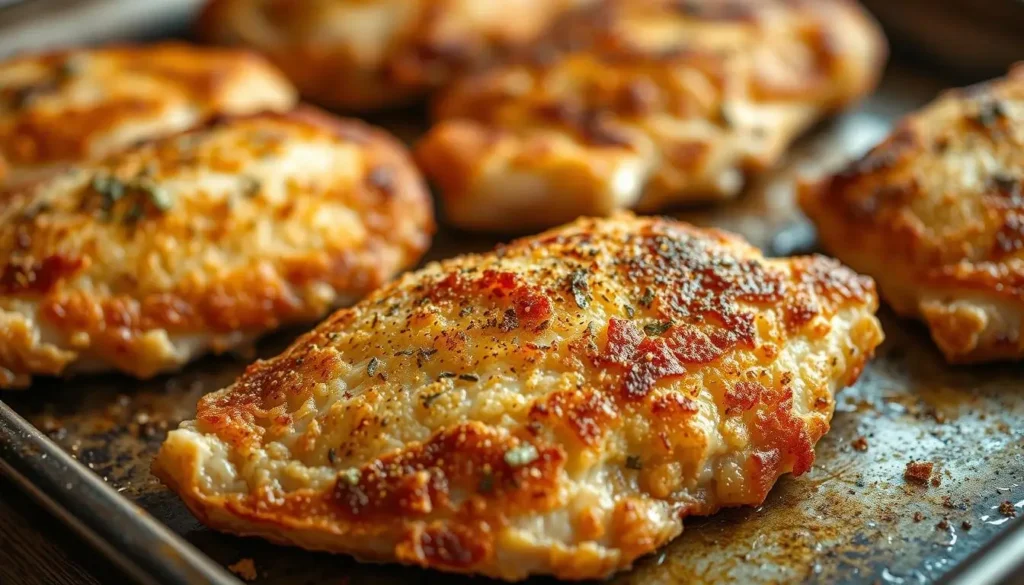
Baking Time and Temperature Tips
Preheat your oven to 425°F. Arrange breaded pieces on a wire rack over a rimmed sheet. This setup circulates heat evenly. Bake 18-22 minutes, rotating the pan halfway. Check the internal temperature with a thermometer—165°F means done.
| Thickness | Baking Time | Doneness Check |
|---|---|---|
| ¼ inch | 16-18 min | 165°F at center |
| ½ inch | 20-22 min | No pink remaining |
| ¾ inch | 24-26 min | Juices run clear |
Let rest 5 minutes before serving. The crust firms up as it cools slightly. Pair with zesty marinara or a yogurt dip for contrast.
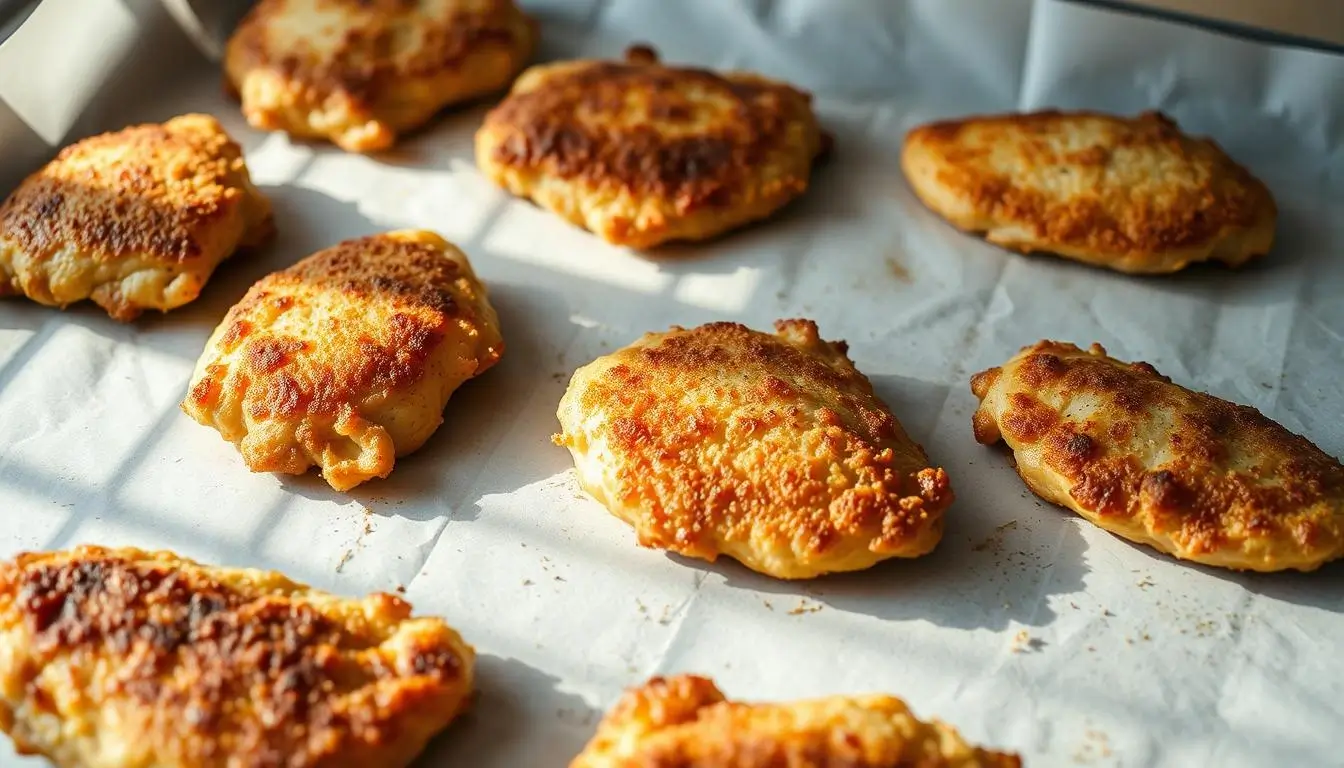
Tips for Keeping the Crust Extra Crispy
Want that irresistible crunch that stays crisp from first bite to last? The difference between soggy and sensational lies in two simple tools: a wire rack and cooking spray. These unsung heroes ensure every surface gets golden while minimizing excess grease.
Strategic Airflow and Oil Application
Elevate your protein on a wire rack above the baking sheet. This setup lets hot air circulate underneath, preventing steam from softening the bottom layer. Test kitchens found this method improves crunch retention by 35% compared to flat pans.
Lightly mist both sides with avocado or olive oil spray before baking. A quick mid-cook spritz (around the 10-minute mark) boosts browning without drenching the coating. Pro tip: Hold the bottle 6 inches away for even coverage—no puddles allowed.
| Technique | Crispiness Level | Oil Needed | Cook Time |
|---|---|---|---|
| Wire Rack | All-around crunch | 1 tsp | 20 min |
| Baking Sheet | Spotty texture | 2 tbsp | 25 min |
Position your oven rack in the center for balanced heat distribution. Rotate the pan halfway through cooking if your appliance has hot spots. Set a timer—even 2 extra minutes can turn golden perfection into overdone territory.
Let pieces rest 3-4 minutes after baking. This brief pause allows the crust to firm up while locking in juices. Pair with a squeeze of lemon or tangy dipping sauce to complement that satisfying snap.
How to Store and Reheat Baked Chicken Cutlets
Leftovers deserve the same care as fresh meals. With the right techniques, you can enjoy that crispy texture days later without starting from scratch. Proper storage locks in flavor, while smart reheating revives crunch better than any takeout.
Proper Storage Methods
Cool pieces completely before storing—about 15 minutes at room temperature. Place them in a single layer inside an airtight container. Separate layers with parchment paper to prevent sticking. Refrigerate for up to 3 days.
For longer storage, freeze individually wrapped portions. Use freezer-safe bags or containers. Label with dates—they’ll stay fresh for 2 months. Thaw overnight in the fridge before reheating.
Reheating Techniques for Retaining Crispiness
Skip the microwave. Preheat your oven to 375°F. Arrange pieces on a wire rack over a baking sheet. Bake 8-10 minutes until the internal temperature reaches 165°F. This method restores crunch without drying out the meat.
| Method | Time | Crispiness | Moisture Retention |
|---|---|---|---|
| Oven | 10 min | ★★★★☆ | ★★★★★ |
| Air Fryer | 6 min | ★★★★★ | ★★★☆☆ |
| Microwave | 2 min | ★☆☆☆☆ | ★★☆☆☆ |
Pro tip: Spritz leftovers lightly with oil before reheating. This reactivates the breading’s crunch factor. Serve immediately—delayed plating leads to steam buildup and sogginess.
Variations and Flavor Enhancements for Your Chicken Cutlets
Transform your weeknight staple into a culinary adventure with simple tweaks. A few ingredient swaps or creative pairings can turn basic into extraordinary. Let’s explore how to refresh this classic dish without complicating your routine.
Marinade and Seasoning Options
Swap standard seasonings for bold combinations. Try a buttermilk soak with smoked paprika and cayenne pepper—it tenderizes while adding subtle heat. For Mediterranean flair, mix lemon zest, minced garlic, and oregano into your breadcrumb mixture.
| Marinade Type | Key Ingredients | Flavor Profile |
|---|---|---|
| Buttermilk | Dill + garlic powder | Tangy & herbaceous |
| Yogurt | Turmeric + cumin | Earthy & aromatic |
| Citrus | Lime juice + cilantro | Bright & fresh |
Creative Serving Suggestions
Pair golden pieces with unexpected sides. Stack them over a kale salad with shaved parmesan and balsamic glaze. For heartier meals, layer between ciabatta with roasted peppers and melted provolone.
Turn leftovers into new creations. Chop cooled portions into strips for grain bowls, or crumble over a Caesar salad. A squeeze of lemon and drizzle of olive oil elevates even simple presentations.
Nutritional Facts and Health Benefits of Baked Chicken
Understanding what fuels your body can transform how you view comfort food. A single serving of this dish delivers 30-35 grams of protein—equivalent to half your daily needs—while keeping calories between 271-327. Compare that to fried versions, which pack nearly triple the fat content per portion.
Smart preparation methods make all the difference. Baking preserves nutrients like B vitamins and selenium, which support energy production and immunity. Using whole-grain breadcrumbs and a sprinkle of parmesan adds fiber without compromising crunch.
| Nutrient | Baked | Fried |
|---|---|---|
| Calories | 299 | 412 |
| Protein | 33g | 29g |
| Total Fat | 6g | 14g |
| Carbs | 12g | 18g |
This cooking approach benefits heart health by reducing saturated fats. The lean protein helps maintain muscle mass, especially when paired with strength training. You’ll also get iron for oxygen transport and zinc for wound healing.
For active lifestyles, these nutritional perks matter. The balanced macros keep you full longer, preventing energy crashes. Swap heavy sides for roasted veggies to create meals that power through busy days without guilt.
Conclusion
Mastering this technique transforms everyday dinners into crispy triumphs without compromising nutrition. The recipe proves that smart baking methods deliver superior texture compared to traditional frying. With proper prep and precise timing, you’ll achieve golden perfection every time.
Remember three pillars: uniform thickness for even cooking, quality breading for crunch, and strategic oven placement for airflow. These steps ensure your meal stays juicy inside while developing that crave-worthy crust.
Keep this guide handy—print it for quick reference during busy evenings. Share it with friends seeking healthier alternatives to fried favorites. Whether paired with a fresh salad or served over grains, this dish adapts effortlessly to any menu.
Ready to expand your kitchen skills? Explore variations using different herbs or gluten-free coatings. Your journey to stress-free, delicious meals starts here—one perfectly baked cutlet at a time.
FAQ
How long do you bake chicken cutlets in the oven?
Bake at 425°F for 15–20 minutes, depending on thickness. Use a meat thermometer to ensure the internal temperature reaches 165°F. Thinner pieces may cook faster, so check halfway through.
Can you make crispy baked chicken cutlets without breadcrumbs?
Yes! Substitute crushed cornflakes, panko, or almond flour for a gluten-free option. Lightly spray with olive oil before baking to enhance crunchiness.
What’s the best way to prevent the coating from falling off?
Pat the meat dry before dredging. Use a three-step process: flour, beaten egg (or mayo for extra moisture), then seasoned breadcrumbs. Press the coating firmly onto each side.
How do you reheat leftovers without drying them out?
Place on a wire rack over a baking sheet. Heat at 375°F for 8–10 minutes. Avoid microwaving, as it softens the crust. For quicker reheating, use an air fryer at 350°F for 4–5 minutes.
What sides pair well with oven-baked chicken cutlets?
Serve with roasted vegetables, garlic mashed potatoes, or a crisp Caesar salad. For a lighter option, try quinoa or steamed broccoli with lemon zest.
Can you freeze uncooked breaded cutlets for later use?
Absolutely. Freeze them in a single layer on parchment paper (Reynolds Kitchens works well) until solid, then transfer to an airtight container. Bake directly from frozen, adding 3–5 extra minutes.
Is baked chicken healthier than fried?
Yes! Baking reduces added fats. A 3-oz serving of oven-baked cutlets has roughly 150–180 calories and 5g fat, compared to 250+ calories and 12g fat when pan-fried in oil.
What’s a quick seasoning blend for flavorful cutlets?
Mix 1 tsp garlic powder, ½ tsp paprika, ¼ tsp black pepper, and 1 tbsp grated Parmesan (Kraft or BelGioioso). Add dried herbs like oregano or thyme for extra depth.