
How To Make Chicken Salad Chick Broccoli Salad at Home ?
Table of Contents
Chicken Salad Chick Broccoli Salad
You’re craving that irresistible crunch and creamy tang from your favorite restaurant side dish. But instead of driving across town, imagine whipping up a perfect copycat version right in your kitchen. That’s exactly what this guide helps you achieve—no fancy skills required..
Whether you’re hosting a summer picnic or meal-prepping lunches, this recipe brings the iconic flavors of Chicken Salad Chick to your table. The secret? A balanced mix of crisp veggies, tender protein, and a dressing that’s both zesty and rich. You’ll learn how to layer textures and tastes like a pro.
We’ve broken down every step, from selecting fresh broccoli to mastering the signature sauce. Even if you’ve never chopped a vegetable before, this method ensures success. Ready to impress your family (or yourself) with a dish that tastes like it came straight from the restaurant?
Key Takeaways
- Recreate the beloved restaurant-style dish with simple, accessible ingredients.
- Follow a step-by-step process designed for all skill levels.
- Discover the secret to achieving the perfect creamy-tangy dressing.
- Discover how to maintain broccoli’s freshness and crunch for the best texture.
- Prepare this popular dish in your own kitchen to save both time and money.
Introduction to This Delicious Broccoli Salad
There’s a reason this crisp, creamy creation has become a fan favorite at restaurants nationwide. Inspired by Chicken Salad Chick’s commitment to fresh, handmade dishes, our version captures the essence of their signature menu item while giving you full control over ingredients.
Overview and Inspiration
Born from Southern charm and a passion for vibrant flavors, the original recipe balances garden-fresh produce with rich, tangy dressing. By making it yourself, you skip preservatives often found in takeout versions. Plus, you can adjust ingredients to match dietary needs or taste preferences.
Why Make It at Home?
Homemade means fresher veggies and smarter swaps—like Greek yogurt instead of heavy mayo. You’ll also save money: one batch costs less than two restaurant orders. Perfect for gatherings, this versatile dish pairs with grilled meats or stands alone as a light lunch.
Ready to transform basic ingredients into a crave-worthy side dish? Let’s dive into the simple techniques that guarantee restaurant-quality results every time.
Chicken Salad Chick Broccoli Salad Recipe Secrets
The magic of this beloved dish lies in three game-changing elements: a dressing with scientific precision, quality ingredients handled with care, and texture contrasts that dance on your tongue. Forget soggy veggies or bland mixes—this method delivers the authentic experience every time.
Start with the dressing’s golden ratio—1/3 cup mayo to 2 tablespoons apple cider vinegar. The vinegar’s sharpness cuts through richness, while a teaspoon of honey adds subtle sweetness. Whisk these first before adding other components to ensure even distribution.
Freshly grated cheddar beats pre-shredded varieties every time. Bagged cheese contains anti-caking agents that dull flavors. For bacon, bake strips at 400°F until crisp—this method prevents uneven frying and delivers perfect crunch.
Keep florets chilled until assembly to maintain their signature snap. Toss them gently with dressing using a rubber spatula. Overmixing causes wilting, while undermixing leaves pockets of undressed veggies.
Let the finished dish rest 20 minutes before serving. This allows flavors to marry without sacrificing texture. Follow these steps precisely, and you’ll swear it came from the restaurant’s own kitchen.
Essential Ingredients and Equipment
Great meals start with quality components. In crafting this dish, each component is vital in shaping its distinctive flavor and texture. Choosing premium items ensures your final result mirrors the restaurant’s beloved version.
Must-Have Ingredients
Freshness is non-negotiable. Fresh broccoli florets serve as the foundation—select vibrant green heads with compact buds. Thick-cut bacon adds smoky depth, while sharp cheddar and mild mozzarella create a creamy contrast. Always grate cheeses yourself for better melt and flavor.
The dressing relies on precise ratios: one-third cup mayonnaise blended with apple cider vinegar gives tanginess without overpowering. A dash of honey balances acidity. Measure these carefully—even slight deviations alter the final taste.
Tools for Easy Preparation
A sturdy cheese grater transforms blocks into fluffy shreds that cling to veggies. Use two mixing bowls—one for dressing and another for combining ingredients. A sharp knife ensures clean cuts through bacon and broccoli stems.
Digital scales or measuring cups guarantee accuracy. Stainless steel tools won’t absorb odors, keeping flavors pure. With these essentials ready, you’re set to build layers of crunch and creaminess like a pro.
Preparing the Broccoli and Bacon to Perfection
Mastering these two components transforms your dish from basic to brilliant. Proper preparation ensures vibrant color, satisfying crunch, and balanced flavors that elevate every bite.
Blanching vs. Raw Broccoli
Blanching unlocks the veggie’s brightest green hue while slightly softening its texture. Bring water to a rolling boil, then submerge florets for 60 seconds. Quickly move them into an ice bath—this halts the cooking process and preserves their crispness.
Prefer extra crunch? Skip blanching and use raw florets. Both methods work, but blanched broccoli absorbs dressing better without becoming mushy.
Perfect Bacon Preparation Techniques
For evenly cooked strips with maximum crispness, bake bacon at 400°F on a wire rack-lined sheet. This technique effectively renders fat, ensuring the outcome is not greasy. Bake 15-18 minutes until golden-brown.
Let bacon cool completely before crumbling. Warm pieces turn soggy when mixed with other ingredients. Patience here ensures every smoky morsel stays delightfully crunchy.
Crafting a Creamy, Tangy Dressing
The heart of this recipe lies in its signature dressing—a harmonious blend that elevates simple ingredients into something extraordinary. Getting the balance right requires precision, but the payoff is a flavor-packed coating that clings to every ingredient without overwhelming it.
Balancing Apple Cider Vinegar and Honey
Begin with ¼ cup of both apple cider vinegar and honey. The vinegar’s sharp acidity brightens the dish, while honey adds mellow sweetness. Combine these first in a bowl—their partnership creates the dressing’s backbone. Gradually whisk in ⅔ cup mayo until fully incorporated.
A dash of salt and pepper brings out the flavors without overpowering. For extra depth, some chefs add a teaspoon of sugar, but this is optional. Taste as you go: too tangy? Add honey. Too sweet? More vinegar. Adjust until your taste buds sing.
Whisking Tips for a Smooth Blend
Use a deep bowl to prevent splatters. Tilt it slightly and whisk in quick, circular motions. This technique traps air, creating a lighter texture. If any lumps appear, take a moment to scrape down the sides of the bowl using a rubber spatula.
Pour the dressing slowly over your ingredients. Toss gently with folding motions—like turning pages in a book. This preserves crunch while ensuring even coverage. Allow it to sit for 10 minutes prior to serving so the flavors can combine.
Step-by-Step Instructions for Assembling the Salad
Transform fresh components into a cohesive dish with these foolproof techniques. Proper assembly ensures every bite bursts with balanced flavors and satisfying crunch. Follow this roadmap to build layers of taste and texture like a seasoned chef.
Mixing and Tossing Methods
- Combine cooled bacon, shredded cheeses, and broccoli florets in a large bowl
- Pour dressing over ingredients in a circular motion for even coverage
- Fold components together using a rubber spatula—think “lift and turn” motions
Work quickly but gently to prevent wilting. Overmixing creates a soggy texture, while undermixing leaves pockets of undressed veggies. Aim for full ingredient coating without crushing delicate elements.
The Importance of Chilling
Immediately after mixing, place the mixture into a container that seals tightly. Refrigerate for at least 30 minutes—this waiting period lets flavors penetrate the ingredients. The cold temperature also helps maintain the dish’s signature crispness.
| Technique | Tool | Result |
| Folding | Rubber Spatula | Even coating |
| Gentle Tossing | Large Bowl | Preserved texture |
| Overmixing | Any Utensil | Soggy outcome |
Set a timer to avoid over-chilling. Beyond two hours, the apple cider vinegar may soften veggies too much. For optimal flavor, aim to serve within 45-60 minutes after chilling.
Tips for a Crowd-Pleasing Side Dish
Transform your dish into a visual masterpiece that guests can’t resist. Presentation elevates simple ingredients into an experience, turning casual bites into conversation starters. A well-styled plate makes flavors feel brighter and textures more dynamic.
Presentation Ideas for Your Salad
Start with a clean, white platter to let colors pop. Layer ingredients vertically in a trifle bowl for depth—florets at the bottom, cheeses in the middle, bacon bits on top. Finish with fresh dill sprigs or edible flowers for a restaurant-worthy touch.
Use small serving bowls for individual portions at buffets. Sprinkle extra sharp cheddar over each serving right before presenting—the golden specks catch the eye. For outdoor gatherings, try mason jars with lids to keep ingredients crisp during transport.
| Technique | Tool | Effect |
| Layering | Trifle Bowl | Visual depth |
| Color Contrast | White Platter | Vibrant appearance |
| Garnish Placement | Herb Sprigs | Freshness cue |
Crumbled bacon bits add smoky aroma and texture contrast when scattered last-minute. Pair with rustic wooden utensils for farmhouse charm or sleek stainless steel servers for modern events. These tweaks take minutes but leave lasting impressions at holiday meals or backyard barbecues.
Creative Variations and Customizations
Your kitchen becomes a flavor lab with this adaptable dish. While the classic combination shines, personal touches let you tailor it to any occasion or craving. Discover how simple swaps and additions can refresh the familiar taste while keeping its soul intact.
Add-Ins for Extra Flavor and Crunch
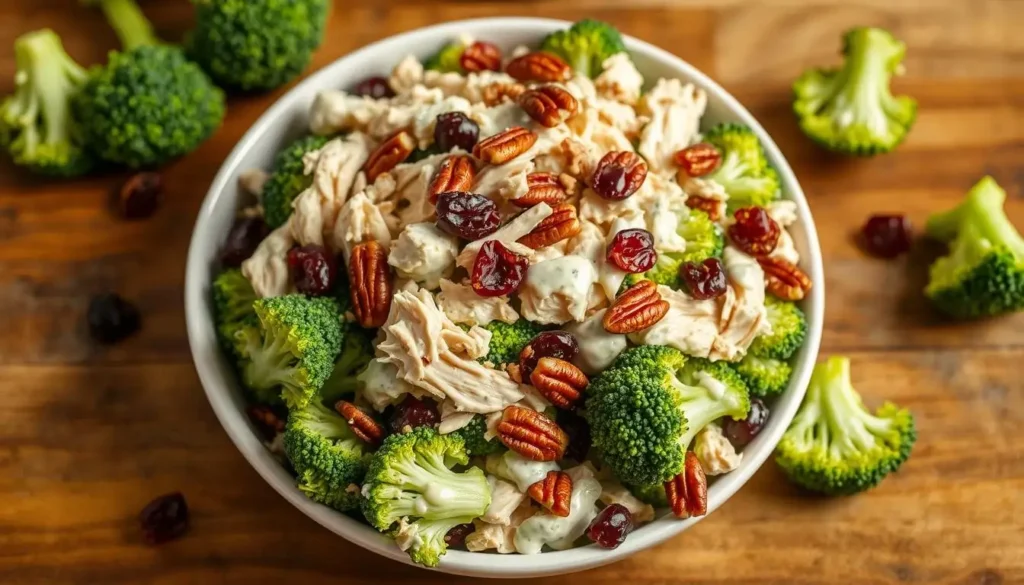
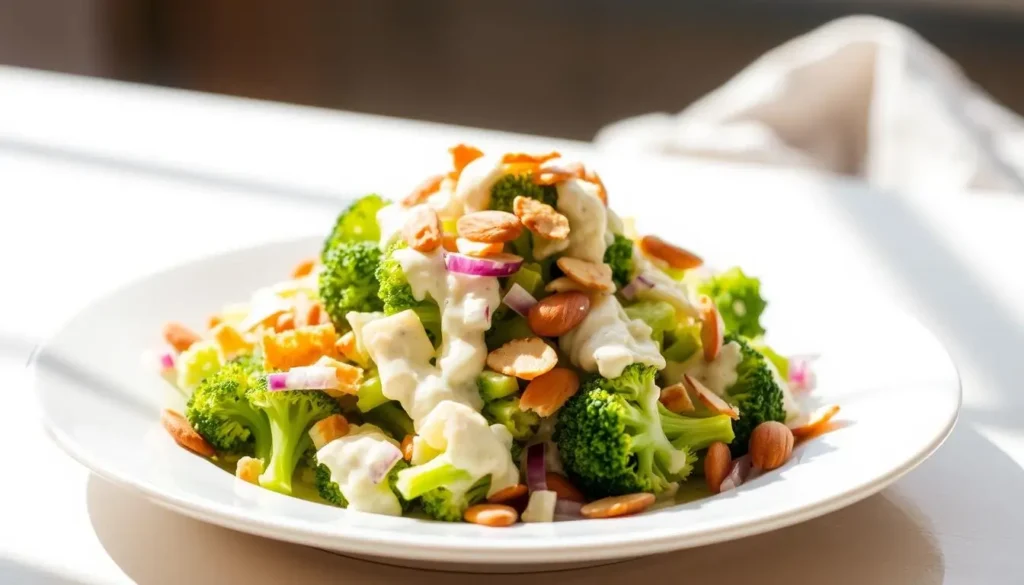
Boost texture and nutrition with smart mix-ins. Try sweet-tart dried cranberries or chewy golden raisins for fruity bursts. Toasted sunflower seeds or candied pecans add nutty richness—perfect for holiday gatherings. Thinly sliced red onion brings sharpness that cuts through creaminess.
For protein-packed versions, fold in shredded rotisserie meat or cubed ham. Smoked turkey complements sharp cheddar exquisitely, and the addition of bacon bits elevates the smoky flavors. Vegetarians might enjoy chickpeas or roasted almonds for heft.
Cheese lovers can experiment beyond cheddar. Crumbled feta adds salty tang, while gouda offers buttery smoothness. Dairy-free? Nutritional yeast mimics cheesy flavor without dairy. Always taste-test new combinations before serving.
Remember: bold add-ins need balanced dressing. For every ½ cup of extras, add 1 tablespoon of mayo or vinegar to maintain moisture. Let your creation chill 15 extra minutes to let flavors harmonize. One bite will prove customization is the spice of kitchen life.
Making Ahead and Storing Your Salad
Smart meal prep starts with strategic storage. Preparing this dish in advance lets flavors develop while saving precious time during busy days. Proper techniques ensure your creation stays crisp and vibrant from fridge to table.
Proper Storage Techniques
Use an airtight container to lock in freshness. Layer ingredients with dressing at the bottom and delicate toppings like bacon bits on top. This prevents sogginess while allowing flavors to mingle. Refrigerate immediately after assembly—never leave it at room temperature longer than 20 minutes.
For optimal outcomes, allow the combined ingredients to chill for 45 minutes prior to serving. This rest period helps the apple cider vinegar and mayonnaise bond with other elements. If storing longer than 8 hours, keep dressing separate in a small jar or resealable bag.
Longevity Tips
Your dish stays fresh for 2-3 days when stored correctly. Revive leftovers by tossing them gently in a large bowl. Consider adding a dash of vinegar or a sprinkle of salt if the flavors seem muted. For texture, sprinkle fresh bacon bits just before serving.
| Storage Time | Condition | Quality Tip |
| 0-24 hours | Dressing mixed in | Optimal crunch |
| 24-48 hours | Dressing separate | Prevent wilting |
| 48+ hours | Not recommended | Texture loss |
Freezing isn’t advised—the creamy base separates upon thawing. Instead, prep dry ingredients 2 days ahead and mix with dressing on event day. This copycat chicken recipe tastes freshest when served within 36 hours of preparation.
Conclusion
Bringing restaurant-quality flavors to your kitchen has never been simpler. This copycat recipe lets you control ingredient freshness while saving time and money. Crisp textures meet creamy dressing in a balanced blend that rivals any takeout order.
Start by prepping vibrant florets and smoky bacon—keys to that signature crunch. Prepare the zesty and sweet sauce by using accurate measurements to achieve reliable outcomes. Gently mix all components together, then refrigerate to allow the flavors to meld beautifully.
Customize your creation with add-ins like toasted nuts or dried fruit. Store leftovers in an airtight container for up to three days, ensuring each bite stays fresh. Pair it with grilled meats or enjoy it solo for a satisfying lunch.
Ready to impress? Print this versatile guide for easy reference during prep. Share your twist using #HomemadeDelights—we’d love to see your spin on this classic side dish. With these tips, every batch becomes a new opportunity to master crowd-pleasing meals.
FAQ
Can I substitute apple cider vinegar in the dressing ?
Yes, but it may alter the tangy flavor. White wine vinegar or lemon juice work as alternatives. Adjust sweetness with honey or sugar to balance acidity.
How long does this dish stay fresh in the fridge ?
Store leftovers in an airtight container for up to 3 days. The flavors meld over time, but the texture remains crisp if prepared with fresh florets.
Is blanching necessary for the florets ?
Blanching softens them slightly, but raw florets add crunch. For a tender bite, steam or blanch for 1-2 minutes before cooling in ice water.
What’s the best way to crisp bacon bits ?
Bake thick-cut strips at 400°F on a wire rack until golden. Pat dry with paper towels before crumbling for maximum crispness without grease.
Can I make this recipe ahead for gatherings ?
Yes! Prep ingredients separately. Combine with the dressing 1-2 hours before serving to maintain texture. Chill in the fridge until ready to serve.
What add-ins boost flavor and texture ?
Toasted almonds, dried cranberries, or shredded sharp cheddar cheese pair well. For extra fiber, mix in sunflower seeds or diced apples.