Cold Smoked Salmon: What It Is and How It’s Made
Table of Contents
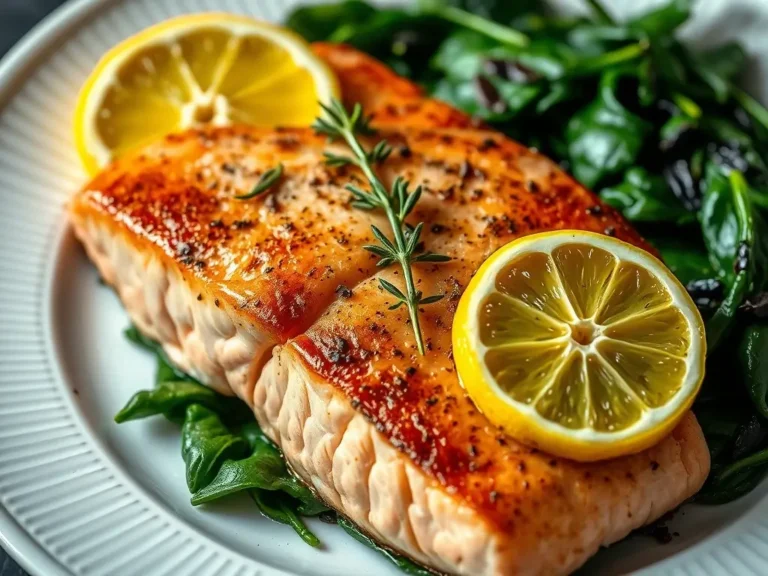
Imagine hosting a summer brunch where your guests rave about the star dish: thinly sliced, velvety fish with a delicate smoky aroma. That’s the magic of mastering this timeless culinary craft. For generations, chefs and home cooks alike have perfected techniques to transform fresh catches into a luxurious delicacy.
Crafting this dish transcends mere procedural steps—it’s a form of artistry. The journey begins with selecting premium, sustainably sourced fish, where quality directly shapes flavor. Through careful curing and precise smoking, you’ll unlock a texture so smooth it practically melts on the tongue.
This guide walks you through every stage, from brining to choosing the right wood chips. You’ll discover how tradition blends with modern methods, ensuring results worthy of a gourmet platter. Whether you’re a seasoned cook or a curious beginner, the process rewards patience and attention to detail.
Key Takeaways
- Learn the handcrafted approach to creating silky, flavorful results
- Follow the curing-to-smoking sequence for optimal texture
- Choose high-grade fish for superior taste and safety
- Balance time-honored techniques with innovative twists
- Discover essential tools for home preparation
- Understand the science behind temperature control
- Master presentation for impressive appetizers
Introduction to Cold Smoked Salmon
Picture a culinary technique that preserves natural moisture while infusing subtle wood-fired notes. This method transforms raw fish into a tender delicacy through controlled exposure to aromatic vapors. The secret lies in balancing precise timing with low-heat application.
Defining the Cold Smoking Process
Unlike high-heat methods, this approach keeps temperatures below 80°F. You’ll use indirect smoke from smoldering wood chips to gently flavor the fish over hours. Brining acts as the first critical step—salt draws out moisture and prepares the surface for smoke absorption.
Dry brines typically work for 6–12 hours, while wet solutions require 4–8 hours. After rinsing, you’ll air-dry the fish to form a sticky pellicle layer. This coating traps smoky aromas during the 8–24 hour smoking phase.
| Brine Type | Preparation Time | Smoking Duration | Flavor Notes |
| Dry Brine | 6–12 hours | 12–24 hours | Intense, concentrated |
| Wet Brine | 4–8 hours | 8–12 hours | Mild, balanced |
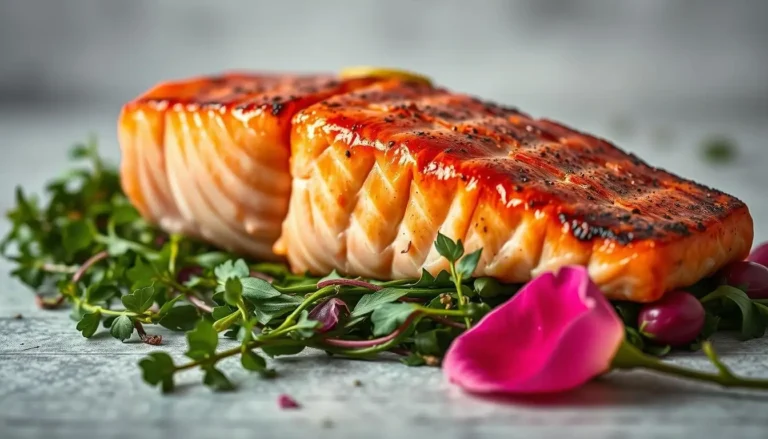
The Appeal of Cold Smoked Salmon
This technique creates a buttery texture that melts on your tongue. Mild woods like alder or maple enhance sweetness without overpowering natural flavors. While quicker methods exist, extended smoking develops deeper complexity—ideal for gourmet charcuterie boards.
You’ll discover how temperature control and wood selection shape results in later sections. Grasp these essential principles initially to establish a solid base.
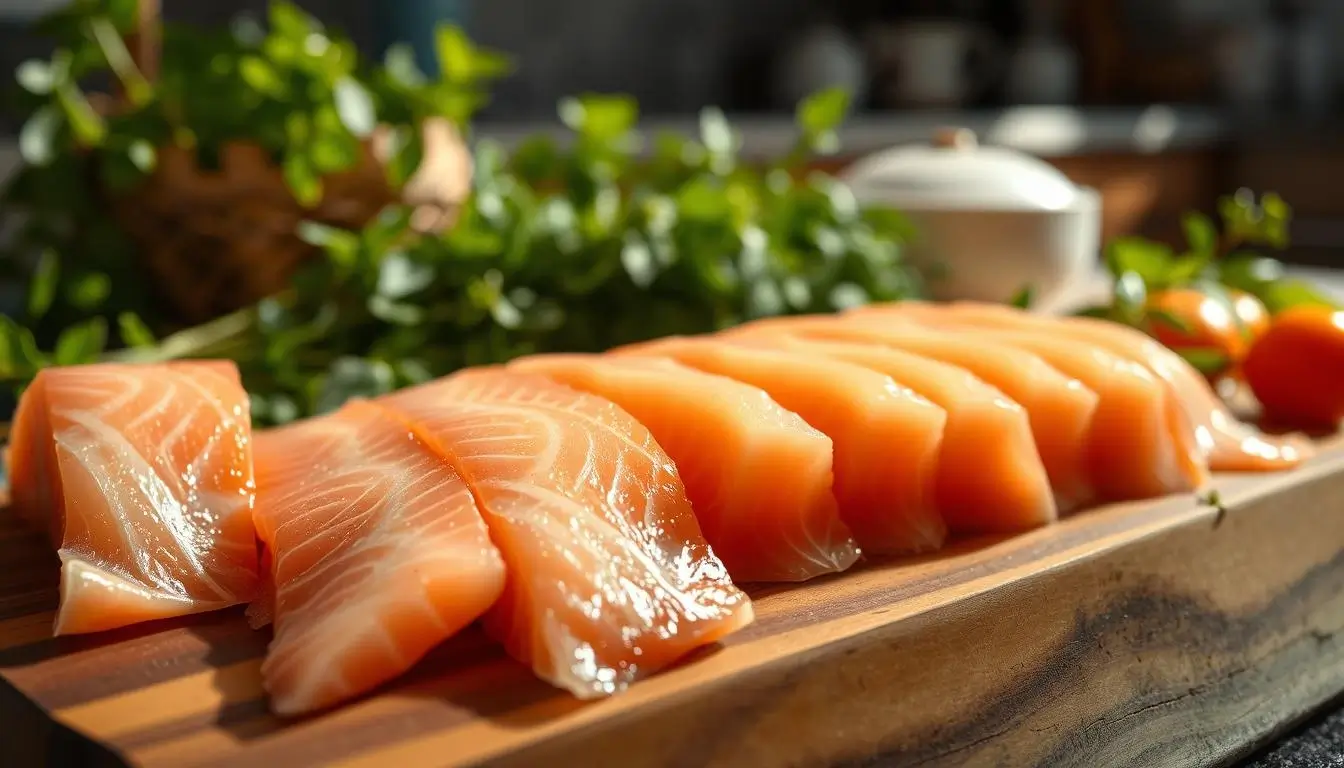
What Makes Cold Smoked Salmon Unique
Think of your favorite charcuterie board—the star ingredient stands out with its velvety feel and rich aroma. This distinctiveness comes from a two-step transformation that reshapes the fish’s structure before smoke ever touches it.
Curing vs. Cooking Methods
Traditional cooking uses heat to alter proteins, but curing relies on salt and sugar to draw out moisture. This process firms the meat while preserving its delicate nature. You’ll notice recipes vary widely—some use dry brines with coarse salt, while others mix spices into wet solutions.
Why does the mixture matter? A higher salt ratio creates a firmer texture, while sugar balances sharpness. Compare these approaches:
| Brine Type | Preparation Time | Texture | Flavor Impact |
| Dry Brine | 8–14 hours | Dense, sliceable | Bold, savory |
| Wet Brine | 4–6 hours | Supple, tender | Mild, slightly sweet |
Cold-smoked varieties achieve their signature silkiness because curing breaks down muscle fibers without heat. This results in delicate, see-through slices that dissolve on your palate. Hot-smoking cooks the fish, yielding a flaky texture better suited for salads or dips.
For home recipes, precision matters. Too much smoking time overwhelms the natural flavor, while insufficient curing risks uneven results. Master this balance, and you’ll create appetizers that rival professional kitchens.
Essential Equipment and Ingredients
Gathering the right tools transforms your kitchen into a smokehouse. Quality gear ensures consistent results while premium ingredients elevate flavor. Let’s explore what you’ll need to craft restaurant-worthy creations at home.
Tools and Smoker Setup
A reliable smoker maintains temperatures below 80°F—critical for safety and texture. Pair it with a grill if your setup requires indirect heat. Stainless steel racks allow airflow, helping form the sticky pellicle layer that traps smoke.
Look for adjustable vents to control airflow. Digital thermometers prevent temperature spikes. Prep your equipment 24 hours before smoking to test heat consistency.
Key Ingredients and Seasonings
Kosher salt draws moisture efficiently without bitter aftertastes. Combine it with brown sugar to balance sharpness—use 1 cup salt per ½ cup sugar for a basic dry brine. Fresh dill or citrus zest adds aromatic complexity.
| Brine Component | Purpose | Measurement | Flavor Impact |
| Kosher Salt | Moisture removal | 1 cup per 3 lbs | Enhances natural taste |
| Brown Sugar | Balances salinity | ½ cup per 3 lbs | Adds caramel notes |
Source coarse-grain salt from trusted seafood suppliers. Measure precisely—too little salt risks spoilage, while excess creates harshness. Prep ingredients in advance for seamless workflow during curing.
Preparing and Curing Your Salmon
Have you ever wondered what separates a silky, perfectly cured fillet from an underwhelming result? It starts with smart choices and precise execution. Let’s break down the essentials for transforming raw fish into a seasoned masterpiece.
Selecting the Right Salmon
Choose fresh, high-grade fish with visible fat marbling. Seek out a firm consistency and a lively pink-orange color. Sustainably sourced options often have cleaner flavor profiles. Steer clear of fillets that exhibit a lackluster hue or emit strong odors—these are signs of deterioration.
Step-by-Step Curing Process
Mix 1 cup kosher salt with ½ cup brown sugar for every 3 pounds of fish. This dry brine ratio balances preservation and flavor. Press the mixture onto all surfaces, including the skin. Set the fillet atop a rack positioned over a baking sheet.
Refrigerate for 6–12 hours. By extracting moisture from the fish, salt establishes a rich flavor foundation. Never shorten this step—bacteria thrive in under-cured fish. Rinse thoroughly under cold water after curing.
| Brine Type | Time Required | Salt Ratio | Final Texture |
| Dry Brine | 6–12 hours | 2:1 (salt:sugar) | Firm & sliceable |
| Wet Brine | 4–8 hours | 1:1 (salt:sugar) | Softer & milder |
Pat the fish dry with paper towels. Air-dry uncovered in the fridge for 2–4 hours to form the pellicle. This sticky layer ensures smoke adheres properly during the next phase. Your patience here determines the final product’s quality.
Developing the Perfect Pellicle
What transforms cured fish into a smoke-ready masterpiece? The answer lies in creating a tacky surface layer called the pellicle. This thin, glossy coating acts like glue for smoke particles, ensuring even flavor distribution during the next phase.
Drying Techniques and Timing
After rinsing off excess salt, pat your fillet dry with paper towels. Place it on a wire rack in the fridge—this allows air circulation on all sides. Let it sit uncovered for 1–3 hours to develop the sticky surface.
Why does timing matter? Too little drying (under 60 minutes) leaves moisture that repels smoke. Excessive time (over 4 hours) creates a tough exterior. Use this simple guide:
| Drying Method | Time Required | Key Benefit |
| Refrigerator with fan | 60–90 minutes | Faster, even coating |
| Standard fridge | 2–3 hours | Gentle moisture removal |
Check the fish every 30 minutes by lightly touching the surface. It should feel slightly sticky—like the back of a postage stamp—but not dry. Adjust your timing based on humidity levels in your kitchen.
Proper airflow prevents uneven spots. Rotate the rack halfway through if your fridge has cooler zones. This attention to detail ensures every slice absorbs smoke uniformly, creating that signature velvety texture.
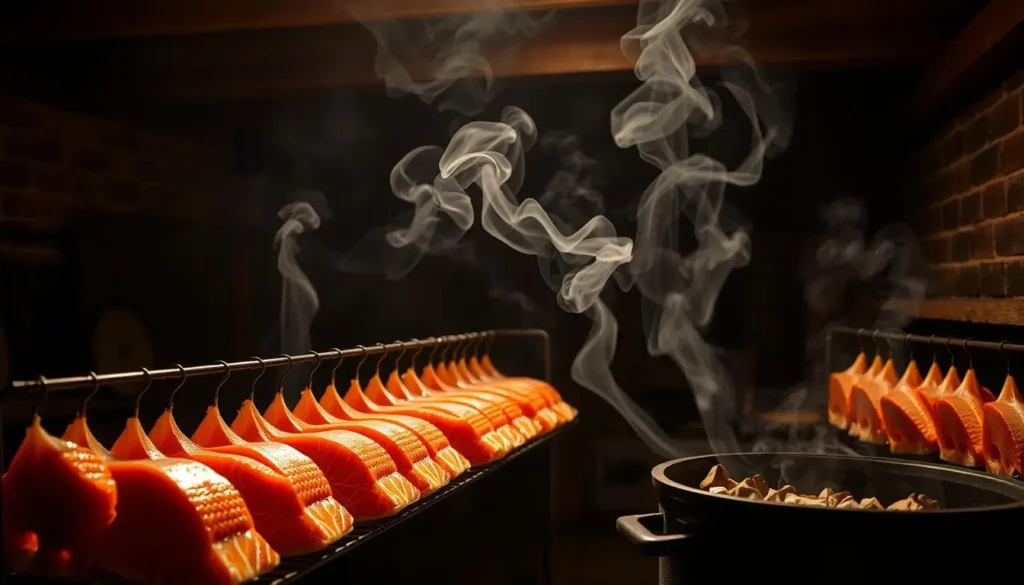
Mastering the Cold Smoking Process
Precision transforms good results into exceptional ones during this delicate phase. You’ll need to balance airflow, heat management, and timing to achieve that signature silkiness. Let’s break down the critical factors that separate amateur attempts from professional-grade outcomes.
Setting Up Your Cold Smoker and Temperature Control
Start by placing your smoker in a shaded area to prevent sun-induced heat spikes. Connect it to a grill or external smoke generator if using indirect methods. Fill the wood chip tray with maple chunks—their mild sweetness complements without overpowering.
Making sure the auxiliary burner stays off is crucial. The goal is to infuse the fish with smoke flavor rather than to cook it. Use a digital thermometer to monitor ambient air temperatures below 80°F. Check these settings every 30 minutes during the first two hours.
| Component | Ideal Range | Monitoring Tool |
| Smoke Density | Thin blue wisps | Visual check |
| Air Temperature | 70–78°F | Digital thermometer |
| Wood Moisture | 30% hydrated | Touch test |
Smoking Duration and Monitoring Texture
Most fillets require 12–18 hours of exposure for optimal flavor penetration. After six hours, gently press the surface—it should feel firm yet springy, not mushy. Translucent edges indicate proper smoke absorption.
Rotate racks every four hours if using a multi-level setup. This prevents uneven texture development. Proper brine application beforehand ensures the fish retains moisture while absorbing smoky notes.
Conclude the procedure once the flesh takes on a golden hue. Let it rest in the fridge for four hours before slicing. This final step tightens the texture, making each slice hold its shape on appetizer boards.
Enhancing Flavor and Texture
Your brine mixture acts as the flavor blueprint for the final product. Small adjustments to ratios and additives create dramatic shifts in taste and mouthfeel. Let’s explore how to customize this foundation for personalized results.
Balancing Sweetness and Salinity
Adjust the salt-sugar ratio to control intensity. A 3:1 ratio (salt to sugar) yields savory dominance, while 1:1 creates caramel undertones. For fruitier notes, replace white sugar with maple syrup—its natural sweetness pairs well with smoky profiles.
Consider these combinations:
| Brine Additive | Ratio Adjustment | Texture Impact |
| Maple Syrup | Reduce salt by 20% | Softer, glossy finish |
| Citrus Zest | Equal parts salt-sugar | Firm with bright notes |
Extended brining (12+ hours) intensifies flavor penetration but risks over-salting. Test smaller batches first. Fresh herbs like dill or tarragon add complexity without overpowering the fish’s natural richness.
Remember: quality ingredients matter. Use pure maple syrup rather than imitation varieties. Your adjustments should complement—not mask—the star ingredient’s delicate character. Track changes in a notebook to refine your signature blend over time.
Comparing Cold and Hot Smoking Techniques
The choice of smoking techniques influences both the flavor profile and the safety of the food. While both approaches enhance taste profiles, their processes yield distinct textures and require different precautions.
Differences in Texture and Safety Guidelines
Cold-smoked varieties maintain a raw-like consistency with silky, translucent slices. Hot-smoked versions develop flaky meat resembling baked fish. This texture contrast stems from temperature:
- Cold method: Never exceeds 80°F
- Hot method: Reaches 145–165°F
Proper rack placement impacts smoke distribution. Arrange fillets on the top rack to ensure uniform exposure in cold setups. For hot techniques, use the side racks to prevent overcooking. Always cure fish thoroughly before cold processing to eliminate pathogens.
| Aspect | Cold Smoking | Hot Smoking |
| Prep Time | 12–24 hours | 2–4 hours |
| Salt Ratio | 3:1 (salt:sugar) | 2:1 (salt:sugar) |
| Food Safety | Requires full curing | Kills bacteria via heat |
Adjust your brine’s salt-sugar balance based on technique. Cold recipes need stronger salinity for preservation. Pair wood choices with your method—fruitwoods complement hot smoking’s boldness, while alder suits delicate cold applications.
Conclusion
Crafting artisanal smoked fish at home rewards patience with unparalleled flavor. You’ve learned how selecting premium fish, precise curing, and controlled smoking create that signature silky texture. Each step—from measuring salt by the cup to monitoring temperature—builds toward gourmet results.
Use a glass bowl for consistent brine mixing, and track time carefully during curing. Maintaining low heat ensures safety while allowing delicate wood notes to shine. For a subtle sweetness, try maple-infused chips during the final hours.
Don’t hesitate to experiment with spice blends or drying techniques. Home chefs often discover unique flavor twists that elevate their creations. Share your smoked masterpieces at gatherings or online—your journey from kitchen to smokehouse deserves celebration.
Ready to impress? Grab fresh fillets, fire up your smoker, and let precision meet creativity. Those golden slices will speak for themselves.
FAQ
How does cold smoking differ from hot smoking?
Cold smoking uses indirect heat below 90°F to infuse flavor without fully cooking the fish, while hot smoking cooks it at higher temperatures (above 120°F). This creates a firmer texture and deeper smoky taste compared to the flakier result of hot smoking.
What ingredients are essential for curing?
Kosher salt and brown sugar form the base of most dry brines. Salt draws moisture to preserve the fish, while sugar balances salinity. Optional additions like maple syrup, herbs, or citrus zest can customize flavor profiles.
How long should you cure the fish before smoking?
A 12–24 hour curing time is typical, depending on thickness. Thicker cuts need longer to penetrate fully. Rinse thoroughly after curing to prevent over-salting, then air-dry to form a sticky pellicle layer for optimal smoke adhesion.
Can you use a regular grill for cold smoking?
Yes, with modifications. Use a smoke tube or separate smoke generator to keep temperatures low. Place the protein on a rack away from direct heat, and monitor with a thermometer to maintain under 90°F.
Is cold-smoked fish safe to eat without cooking?
Proper curing and smoking techniques minimize risks, but use only fresh, sushi-grade cuts. Pregnant individuals or those with compromised immunity should consult health guidelines, as raw preparations carry inherent risks.
Why does the pellicle matter in the process?
The tacky surface formed during drying traps smoke particles better, enhancing flavor absorption. Skipping this step leads to uneven seasoning and a less pronounced smoky profile.
How do you store leftovers after smoking?
Wrap tightly in wax paper or vacuum-seal, then refrigerate for up to two weeks. For longer storage, freeze portions up to three months. Thaw overnight in the fridge before serving.