
How to Oven Roast Beef: A Simple Guide
Table of Contents
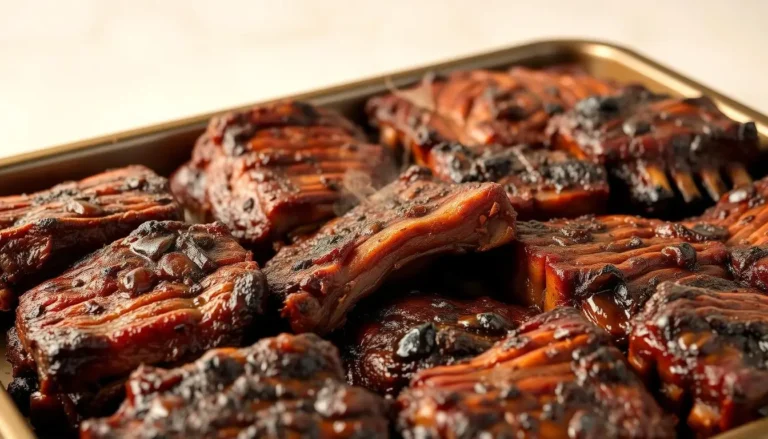
How To Oven Roast Beef
What if you could create a restaurant-quality roast without complicated steps or professional equipment? This guide strips away the guesswork, revealing a straightforward approach to achieving tender, flavorful meat every time.
Traditional methods often involve messy searing or constant temperature adjustments. Here, you’ll discover a streamlined technique that starts with intense heat to lock in juices before gently finishing the cook. The result? A caramelized crust with melt-in-your-mouth tenderness underneath.
You don’t need fancy tools or rare ingredients. With just a reliable oven, basic seasonings, and quality meat, you’re already halfway there. We’ll walk through selecting the right cut, prepping your workspace, and timing everything for optimal results.
Whether hosting a holiday dinner or craving Sunday comfort food, this method adapts to your needs. Forget dry, overcooked disasters – our approach prioritizes consistency, making it ideal for first-timers and seasoned cooks alike.
Key Takeaways
- Eliminate the need for searing by utilizing an effective two-temperature oven method
- Utilize a few ingredients to allow the inherent flavors of the meat to take center stage
- Achieve even cooking through proper prep and positioning
- Monitor doneness without fancy gadgets using simple visual cues
- Rest your roast properly for maximum juiciness
Introduction to Roast Beef Mastery
The secret to tender, flavorful meat lies in balancing simplicity with precision. This approach skips complex methods while focusing on core techniques that guarantee consistency. You’ll learn to transform basic ingredients into something extraordinary through careful timing and heat management.
Overview of the Recipe
Expect a streamlined process requiring 90 minutes total time, divided between high-heat searing and gentle roasting. Quality matters: choose cuts with even marbling like ribeye or sirloin for optimal results. A mix of coarse salt, cracked pepper, and rosemary forms the foundation of flavor.
What Makes a Perfect Roast?
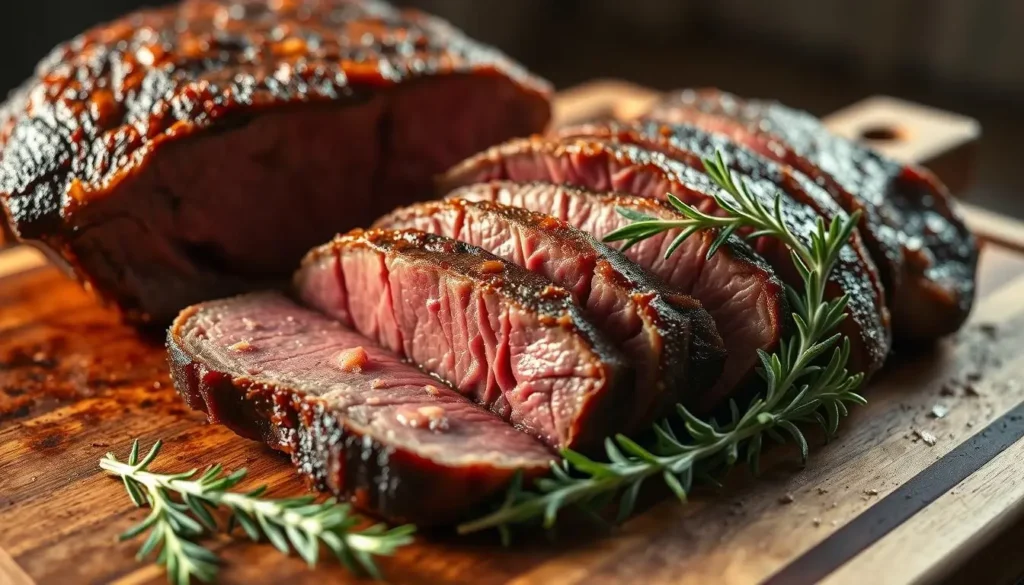
A golden-brown crust protecting juicy, pink-centered meat defines excellence. Achieve this by starting at 450°F to create surface caramelization, then reducing to 325°F for even cooking. Resting the meat 15 minutes before slicing ensures juices redistribute properly.
| Cut | Ideal Cooking Time | Best For | Marbling Score |
|---|---|---|---|
| Top Round | 20 min/lb | Lean meals | 3/5 |
| Rump Roast | 25 min/lb | Bold flavors | 4/5 |
| Sirloin Tip | 18 min/lb | Tender slices | 4/5 |
Control is key: overcooking by even 5°F can turn succulent meat dry. Use this guide’s flexible framework to adjust herb blends or doneness levels while maintaining core principles.
Essential Tools and Ingredients for a Tasty Roast
Great results begin with proper preparation. Having the right gear and fresh components ensures your efforts translate into a juicy, flavorful centerpiece. Let’s explore what truly matters in your toolkit and pantry.
Key Kitchen Equipment
Three items prove indispensable. A heavy-duty roasting pan with a rack promotes even air circulation. Pair it with a wire rack to elevate the meat, preventing uneven cooking.
Don’t overlook a digital meat thermometer. It removes guesswork by tracking internal temperatures accurately. For best results, choose one with a thin probe and fast response time.
| Tool | Function | Why It Matters |
|---|---|---|
| Roasting Pan | Heat distribution | Prevents hot spots |
| Wire Rack | Airflow management | Crisps all surfaces |
| Thermometer | Doneness control | Avoids overcooking |
Must-Have Ingredients
Extra-virgin olive oil serves dual purposes. It aids in the adhesion of herbs to the meat while also promoting browning. Fresh garlic, rosemary, and thyme create a fragrant crust when mixed with coarse salt and cracked pepper.
Measure seasonings carefully. Too little salt fails to enhance natural flavors, while excessive amounts dominate. A 1½ tsp per pound ratio works well for most cuts.
Understanding Different Cuts of Roast Beef
Your choice of meat determines whether you’ll carve tender slices or struggle with chewiness. Each cut behaves differently under heat, transforming unique textures and flavors into your final dish.
Selecting the Best Cut for Your Meal
Visible marbling – those white flecks in the meat – acts as your flavor guarantee. Cuts like ribeye or sirloin tip shine for special occasions, their fat melting into buttery richness. Budget-friendly options like top round work well for weeknights but require careful slicing against the grain.
Ask your butcher for uniform thickness. A tied roast ensures even cooking, preventing dried edges and underdone centers. Eye round roast offers leaner results, ideal for those watching fat intake.
Comparison of Popular Cuts
| Cut | Texture | Best For | Marbling |
|---|---|---|---|
| Top Round | Firm | Sandwiches | Low |
| Rump Roast | Dense | Pot Roasts | Medium |
| Sirloin Tip | Buttery | Holiday Meals | High |
Notice how fat content impacts juiciness. Higher marbling means shorter cooking times and bolder flavors. For roasts needing longer cooking, choose cuts with connective tissue that breaks down into gelatin.
Pro tip: Request “second-cut” options from your butcher. These slightly thicker slices often cost less while delivering similar quality to premium selections.
Preparation Tips Before You Begin Cooking
The foundation of a perfect roast lies in the steps taken before the oven heats up. Smart preparation eliminates guesswork and sets the stage for even cooking. Follow these essential techniques to maximize flavor and texture.
Getting the Beef to Room Temperature
Remove your cut from the refrigerator 60-90 minutes before cooking. Chilled meat cooks inconsistently – the outer sections tend to overcook, leaving the center underdone. Letting it rest on the counter helps achieve uniform doneness.
For enhanced browning, place the unwrapped meat on a wire rack in your fridge for 1 hour. This air-drying step creates a surface that caramelizes beautifully under high heat.
Prepping and Seasoning Your Roast
Pat the meat dry with paper towels. Moisture prevents proper browning. Rub with olive oil first – this helps seasonings stick and promotes crust formation.
Use 1 tsp salt per pound as your baseline. Combine with cracked black pepper, minced garlic, and rosemary. Massage the blend into all surfaces, including crevices.
Consider your cut’s size and thickness when planning. Larger roasts need slightly more seasoning, while thinner cuts require gentler handling. Always place seasoned meat on a wire rack in the pan for optimal airflow.
This prep work takes 15 minutes but makes all the difference. You’ll notice deeper flavors, crispier exteriors, and juicier results when these steps become routine.
How to oven roast beef: Techniques and Best Practices
Harnessing high and low temperatures creates the ideal crust and tenderness. This method works with any cut, transforming your meal through strategic heat management. Let’s explore the principles that underlie this technique.
Setting the Right Oven Temperature
Begin by preheating your oven to 450°F. This initial blast of heat triggers the Maillard reaction – the chemical process responsible for browning and flavor development. Place your seasoned meat on a wire rack to ensure all surfaces crisp evenly.
After 15 minutes, reduce the heat to 325°F. Lowering the temperature allows the internal layers to cook gently without burning the exterior. Use this phase to monitor progress with a digital meat thermometer inserted into the thickest part.
| Phase | Temperature | Duration | Purpose |
|---|---|---|---|
| Browning | 450°F | 15 minutes | Create crust |
| Roasting | 325°F | 20 min/lb | Even cooking |
The two-stage method prevents dryness by controlling how quickly heat penetrates the meat. Pro tip: Keep the oven door closed during temperature adjustments to maintain stable conditions.
Your thermometer becomes your best ally here. Target 120-125°F for rare or 135°F for medium-rare. Remember – carryover cooking raises the internal temperature by 5-10°F during resting.
Temperature, Timing, and Achieving Desired Doneness
Precision transforms good meat into exceptional meals. Mastering heat control and timing ensures your protein reaches its full potential while staying juicy. Let’s explore how to balance these elements for flawless results.
Using a Meat Thermometer Effectively
Insert the probe into the thickest part, avoiding bones or fat pockets. For accuracy, position the tip in the center of the meat mass. Digital thermometers with instant-read features give reliable feedback in seconds.
Follow these steps:
- Check temperature during the last third of cooking time
- Record readings from multiple spots for consistency
- Clean the probe between uses to prevent contamination
Understanding Doneness Levels
Internal temperatures determine texture and color. Remove meat from heat 5-10°F below your target – residual heat completes the cooking process. It’s essential to allow the meat to rest for 20-30 minutes prior to cutting.
| Doneness | Temperature (°F) | Texture |
|---|---|---|
| Rare | 120-125 | Soft, bright red center |
| Medium-Rare | 130-135 | Warm pink core |
| Medium | 140-145 | Slightly pink middle |
For a 4-pound cut, plan 1.5-2 hours total cooking time. Larger roasts need 15 extra minutes per pound. Track both oven duration and internal readings to avoid overcooking.
Creating a Flavorful Herb Rub to Enhance Your Meat
Transform ordinary cuts into aromatic masterpieces with a custom blend of seasonings. The right combination elevates natural meat flavors while creating a textured crust that crackles with every bite.
Mixing Olive Oil, Garlic, and Herbs
Start with ¼ cup olive oil as your flavor carrier. Add 3 minced garlic cloves for earthy depth, then mix in 1 tbsp each of chopped rosemary and thyme. These robust herbs stand up to high heat without losing their character.
Rub the mixture into every surface, including hidden crevices. The oil helps seasonings cling to the meat while jumpstarting caramelization. For even distribution, massage in circular motions using your fingertips.
Balancing Salt and Pepper for Perfection
Use 1½ tsp salt per pound as your foundation. Coarse grains dissolve slowly, seasoning the meat from surface to center. Using freshly ground black pepper introduces a mild spiciness – strive for a 2:1 ratio of salt to pepper.
This equilibrium allows the inherent richness of the beef to come forward without being overwhelmed. Taste your rub before applying – it should make your mouth water slightly, not burn. Adjust proportions if substituting dried herbs, as they’re more concentrated.
Allow the seasoned meat to sit for 30 minutes prior to cooking. This pause allows flavors to penetrate while the oil forms a protective layer. The result? A golden crust locking in juices during roasting.
Mastering Browning and the Perfect Crust
Achieving that golden, crackling exterior requires more than just heat—it demands strategy. The magic happens when surface chemistry meets precise temperature control, creating layers of flavor through intentional technique.
High Heat Techniques for a Beautiful Crust
Blast your protein with 450°F heat during the first 15 minutes. This intense burst triggers caramelization, forming a savory barrier that locks in natural juices. Dry surfaces brown faster—pat meat thoroughly before seasoning to remove moisture from packaging or refrigeration.
Lower the temperature to 325°F after initial searing. Gentle roasting preserves tenderness while maintaining that crisp exterior. Balance is crucial: too much high heat dries edges, while insufficient browning leaves flavors underdeveloped.
Watch for visual cues like deep amber coloring and audible sizzling. Rotate your pan halfway through the searing phase if hotspots develop. Pro tip: Use oven lights instead of opening the door to monitor progress without losing heat.
This two-stage method works wonders for various cuts. Thicker roasts benefit from extended high-heat exposure, while leaner options need shorter searing times. Adjust based on your cut’s marbling and thickness for consistent results.
Delicious Serving Suggestions and Accompaniments
The perfect meal isn’t just about the protein—it’s about harmony on the plate. Thoughtful pairings enhance textures and flavors, turning your centerpiece into a cohesive dining experience. Let’s explore combinations that honor tradition while inviting creativity.
Traditional Sides and Modern Twists
Classic pairings like Yorkshire pudding and horseradish cream never disappoint. Roasted root vegetables caramelize beautifully in the same pan used for cooking meat, absorbing savory drippings. For lighter options, try shaved Brussels sprouts with lemon zest or honey-glazed carrots.
Contemporary menus might feature:
- Quinoa salads with pomegranate seeds
- Smashed potatoes with garlic aioli
- Charred broccolini with chili flakes
Plan 6-8 ounces of meat per pound when serving groups. A 3-pound roast comfortably feeds four adults with leftovers. Always include starch and vegetable elements for balanced plates.
Ideas for Leftover Roast Beef
Transform extra portions into next-day lunches or quick dinners. Thinly sliced meat shines in French dip sandwiches with au jus for dipping. Toss chunks into fried rice or breakfast hash for protein-packed upgrades.
Try these reinvented dishes:
- Philly cheesesteak stuffed peppers
- Beef and barley soup with fresh herbs
- Thai-style salad rolls with peanut sauce
Keep leftover food in sealed containers for a maximum of four days. Freeze portions flat in bags to save space—thaw overnight for sandwiches or stir-fries. Your future self will appreciate the convenience during hectic days.
Storing and Reheating Your Roast Beef Safely
Proper storage transforms leftovers into delicious next-day meals. Follow these guidelines to maintain quality while preventing foodborne illnesses. Smart techniques preserve texture and flavor, letting you enjoy your efforts beyond the initial serving.
Proper Refrigeration Methods
Allow cooked meat to reach room temperature within two hours. Slice only what you’ll eat immediately – keeping the roast whole prevents moisture loss. Securely cover with foil or transfer to a sealed container. Position on the middle shelf of your refrigerator for optimal cooling.
Consume within 3-4 days for best quality. Serve alongside vibrant options such as steamed greens or creamy mashed potatoes. If juices accumulate, drain them before reheating to avoid sogginess.
Freezing and Thawing for Future Meals
For longer storage, double-wrap portions in plastic and foil. Label packages with dates – frozen roast maintains quality for 2-3 months. Defrost in the refrigerator overnight, avoiding room temperature thawing.
Warm the slices in an oven set to 350°F for about 10-15 minutes. Cover with foil to retain moisture, removing it during the last few minutes to crisp edges. Always allow to rest for 5 minutes prior to serving to ensure juices are redistributed.
These methods ensure your protein stays tender and flavorful. Whether crafting sandwiches or enhancing salads, properly stored leftovers deliver convenience without compromising taste.
Enhancing Your Roast with Gravy and Sauces
A well-crafted sauce transforms good meat into an unforgettable dining experience. While your protein rests, use this golden opportunity to create rich accompaniments that amplify its natural flavors. The process takes minutes but elevates every bite.
Crafting Pan-Dripping Gravy
Start by placing your roasting pan over medium heat. Pour 1 cup of beef stock or red wine into the vessel, scraping up browned bits with a wooden spoon. These crispy fragments hold concentrated flavor from the cooking process.
Combine 2 tablespoons of cornstarch with ¼ cup of cold water to form a slurry. Slowly pour it into the simmering juices while stirring constantly. Keep simmering the mixture until it reaches a consistency that allows it to cling to the back of a spoon.
| Ingredient | Purpose | Pro Tip |
|---|---|---|
| Pan drippings | Flavor base | Strain for smooth texture |
| Cornstarch | Thickening agent | Mix with cold liquid first |
| Fresh thyme | Aromatic boost | Add sprigs whole |
Beyond Basic Gravy
For tangy alternatives, try whisking horseradish into sour cream or Greek yogurt. Mushroom lovers can sauté sliced creminis in butter with garlic, then deglaze with sherry vinegar. Both options pair beautifully with your main side dishes.
Remember: The best recipe for success lies in tasting as you go. Adjust salt levels gradually, and let fresh herbs like thyme steep in warm gravy for 5 minutes before serving. Your efforts will shine through in every savory spoonful.
Conclusion
Mastering restaurant-quality results at home becomes effortless when applying these proven methods. Focus on three essentials: temperature control, precise timing, and proper seasoning. Your journey from raw cut to tender centerpiece relies on monitoring internal heat and adjusting cooking duration based on size.
Always let your protein rest for the recommended 15-20 minutes after cooking. This pause allows juices to redistribute, ensuring each slice stays succulent. For best outcomes, track minutes per pound and use a reliable thermometer – these tools prevent overcooking while maintaining ideal texture.
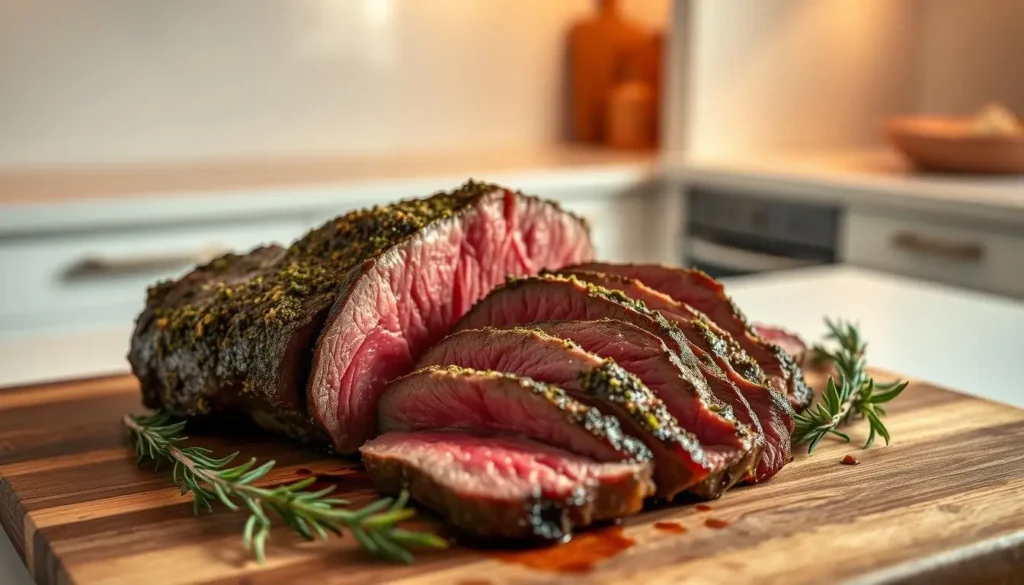
Experiment with cuts like eye round roast or sirloin tip to discover personal favorites. Share your creations with friends or family, showcasing the crispy crust and pink-centered perfection you’ve achieved. Now that you possess these techniques, transforming quality meat into memorable meals becomes second nature.
Ready to impress? Grab your preferred cut, preheat with confidence, and let your kitchen skills shine. Tag us in your culinary triumphs – we’d love to celebrate your juicy, flavorful success!
FAQ
What’s the best cut for oven-roasted beef?
Top round, rump, or eye round roast work well. These lean cuts develop rich flavor when seasoned properly and roasted at high heat. Consider thickness and marbling for even cooking.
Why should beef sit at room temperature before roasting?
Letting meat rest for 30-45 minutes ensures even cooking. Cold beef straight from the refrigerator can lead to uneven doneness and a tougher texture.
How do I prevent my roast from drying out?
Use a meat thermometer to monitor internal temperature. Remove the roast 5-10°F below your target doneness, as residual heat will finish cooking it while resting.
Can I use dried herbs instead of fresh for the rub?
Yes, but reduce the amount by half. Dried thyme, rosemary, or garlic powder are potent. Mix with olive oil, salt, and pepper to create a balanced crust.
How long should beef rest after roasting?
Let it rest 15-20 minutes under foil. This allows juices to redistribute, ensuring moist slices. Cutting too soon releases flavorful juices onto the cutting board.
What oven temperature works for a crispy crust?
Start at 450°F for 15 minutes to sear, then reduce to 325°F. This high-low method locks in moisture while developing a golden-brown exterior.
How do I repurpose leftover roast beef?
Thinly slice leftovers for sandwiches, add to salads, or chop for tacos. Store in an airtight container in the refrigerator for up to 4 days or freeze for 3 months.
Can I make gravy from pan drippings?
Absolutely. Deglaze the roasting pan with broth, whisk in flour, and simmer. Strain for a smooth gravy, adjusting salt and pepper to taste.
Is it safe to refrigerate cooked roast beef?
Yes. Cool the meat within 2 hours, wrap tightly in foil or plastic, and refrigerate. Use within 4 days for optimal quality and safety.
What sides pair well with roast beef?
Classic options include mashed potatoes, roasted carrots, or Yorkshire pudding. For a modern twist, try quinoa salad or garlicky sautéed greens.